Spinning

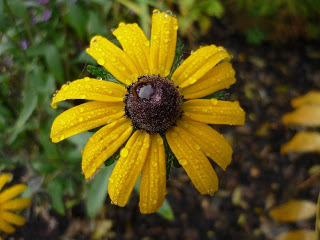
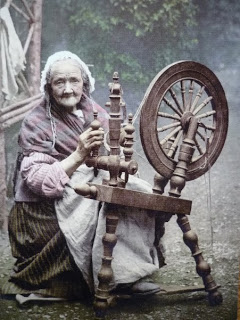
Well, this is not me yet, but give me 50 years...

I am very much enjoying the spinning wheel, and love sitting down in the evenings and spinning up a small amount of wonky yarn. I am also enjoying learning more about fibres and where they come from, making me want to only buy organic and fairly traded cotton, and local animal fibres, farmed in a sustainable way. (Although if anyone is planning a visit to the zoo anytime soon, please ask for some camel hair...)
And I seem to have turned into the type of person who thinks it is perfectly reasonable to spin hair out of the contents of the dog brush - why not! Sure the possibilities for spinning seem endless!

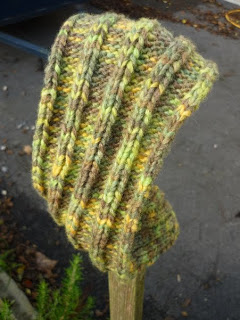
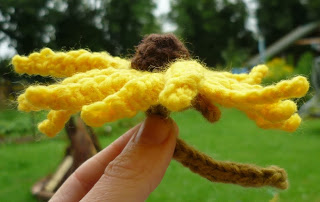
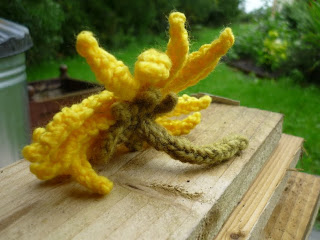
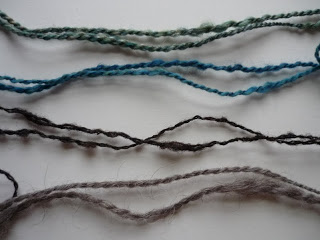
Here are some of my lumpy efforts...
From top to bottom, a 80/20 wool/silk mix spun from top; carded merino, carded Badgerfaced Welsh Mountain Sheep (Tor Wen) (great name) spun in the grease; and Massam spun from top.

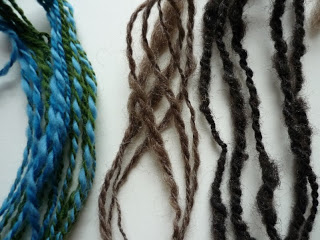
And, left to right, merino spun from top, Bluefaced Leicester (deliciously nice to spin) from top, and a thicker version of the Badgerfaced Welsh Mountain Sheep.

I've always considered knitting, crochet, spinning and such to be evening activities, best carried out by the fire in the autumn or winter. Recently reading Lilias Mitchell's Irish Spinning, Weaving and Dyeing, I came across an explanation for why this is the best time, given in the seventies from a woman in Achill Island:
It is best to work with wool while the sheep are at rest - "from six o'clock in the evening till twelve o'clock, when the fairies appear. Then...the wool is much more easy to handle and tangled threads can be undone without any trouble."

In fact, in certain houses, the drive band was taken off the wheel when work stopped, "in case the little people might be tempted to use it."
(In my home, it is usually the cat, who comes in and starts trying to play with the wheel, often removing the band in the process...)
(And one wonders when they say "any mischief might happen to the wool" whether it might have more to do with poitin consumption than the little people...) But I like the idea of using wool while the sheep are resting, so I'll go with that one!

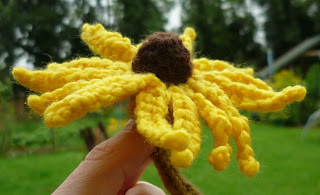
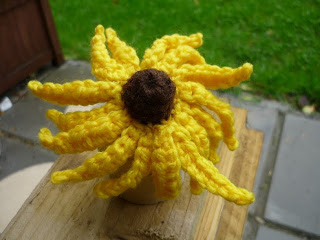
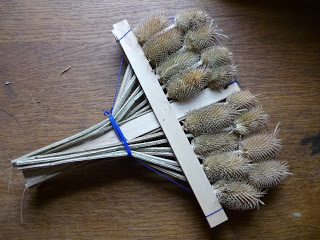
I've been wanting to post a picture of this amazing carder for a while. A friend brought it back from Columbia for me. It is made of teasels, all sandwiched between two thin bits of wood and held in place. Its so beautiful I don't even want to use it!
I know teasels were also used in Ireland for teasing out wool, I presume that is where they got their name from.


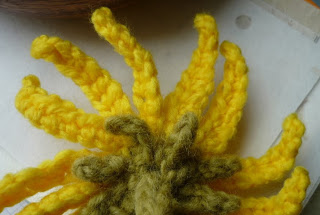
My friend also brought me back some amazing hand spun yarn. Pictured here is one of the balls. (the other is white.) I knitted and felted a pair of slippers out of it. It was like knitting with part of Columbia - full of bits of vegetation, dirt and thorns, and with a strong smell of sheep.

I could really imagine someone making it by hand. The yarn you buy in shops is so highly processed in comparison that it was a totally different experience to work with this wool. My mind was filled with pictures of little old ladies spinning outdoors in Columbia with a drop spindle or a stone, and my nose was filled with the scent of sheep, of plants, and the smell of the outdoors. It was great to work with such evocative material, and that, especially, is what I am enjoying about spinning - how close to source you are, using wool straight off the sheep's back and going through each process yourself. It makes you appreciate it a lot more.

Giant Daisy Headband

The design for this came along due to sloppy knitting really – I decided not to bother working out the rate of increases and ended up with a long tail at the start. Instead of ripping back I decided this long tail would be knotted to form a “button”, and a “buttonhole” at the other end would complete the fastening. That way it is also adjustable, and when it stretches from being worn you can just tie a knot further up, or use a figure-of-eight knot. It is reversible too.

The headband is knitted lengthways, using increases to make it wider in the middle than the ends. It doesn’t really matter what the tension of the yarn you are using is – you could just start off with 4 stitches and increase until it’s the width you want, then decrease.

I used some lovely Italian yarn I was given called Arianna Grignasco, and knit it on smaller needles than recommended to get a nice rib. I used 4mm needles. (It recommended 6-7mm)


Gauge:

On 4mm needles, using k2, p4 rib;

16sts or 28 rows = 4”

CO – cast on

st/s stitch/es

k – knit

p - purl

m1 – make one

kfb – knit into front and back of next st


Pattern:

CO 4 sts

k all sts

p all sts

k2, m1, k2

(p2, k1, p2

k2, p1, k2) do these 2 rows 3 times

p2, kfb, p2

(k2, p2, k2

p2, k2, p2) three times

k2, p2, k2

p2, k1, m1, k1, p2

(k2, p3, k2

p2, k3, p2) twice

(k2, p1, k1, p1, k2

p2, k1, p1, k1, p2) twice

k2, p1, kfb, p1, k2

(p2, k1, p2, k1,p2

k2, p1, k2, p1, k2) twice

p2, kfb, p2, kfb, p2

(k2, p2, k2, p2, k2

p2, k2, p2, k2, p2) twice

k2, p2, k2, p2, k2,

p2, k1, kfb, p2, kfb, k1, p2

(k2, p3, k2, p3, k2

p2, k3, p2, k3, p2) twice

k2, p1, kfb, p1, k2, p1, kfb, p1, k2

(p2, k1, p2, k1, p2, k1, p2, k1, p2

k2, p1, k2, p1, k2, p1, k2, p1, k2) twice

p2, kfb, p2, k1, p2, k1, p2, kfb, p2

(k2, p2, k2, p1, k2, p1, k2, p2, k2

p2, k2, p2, k1, p2, k1, p2, k2, p2) twice

k2, p2, k2, p1, k2, p1, k2, p2, k2

p2, k2, p2, kfb, p2, kfb, p2, k2, p2

(k2, p2, k2, p2, k2, p2, k2, p2, k2

p2, k2, p2, k2, p2, k2, p2, k2, p2) twice

k2, p2, k2, p2, k2, p2, k2, p2, k2

p2, k2, p2, k1, kfb, p2, kfb, k1, p2, k2, p2

(k2, p2, k2, p3, k2, p3, k2, p2, k2

p2, k2, p2, k3, p2, k3, p2, k2, p2) twice

k2, p2, k2, p3, k2, p3, k2, p2, k2

p2, k1, kfb, p2, k3, p2, k3, p2, kfb, k1, p2

(k2, p3, k2, p3, k2, p3, k2, p3, k2

p2, k3, p2, k3, p2, k3, p2, k3, p2) twice

k2, p3, k2, p3, k2, p3, k2, p3, k2

p2, k3, p2, k2, kfb, p2, kfb, k2, p2, k3, p2

(k2, p3, k2, p4, k2, p4, k2, p3, k2

p2, k3, p2, k4, p2, k4, p2, k3, p2) twice

k2, p3, k2, p4, k2, p4, k2, p3, k2

p2, k2, kfb, p2, k4, p2, k4, p2, kfb, k2, p2

Hooray, finally finished the end of the increases. Mark the end of the increases with a safety pin. Tie a knot in the beginning of your knitting. Measure the distance around your head. Divide this number in two (I was making mine 22” long, so half that is 11”) Now measure the distance from the end of your knot (see picture) to the end of the increases. This is x. The distance from the end of the increases to the middle of the hat is y.

2x + 2y = Circumference

So, if the circumference of your head is 22, and x is 5” (as in my case), then 10 + 2y = 22, so 2y = 12. So now continue is pattern for 2y (12” in my case), then start reducing. I hope that makes sense!!!

Begin reducing.

P2, k1, k2tog, k1, p2, k4, p2, k4, p2, k1, k2tog, k1, p2

Continue in pattern for next 5 rows

P2, k3, p2, k1, k2tog, k1, p2, k1, k2tog, k1, p2, k3, p2

Continue in pattern for next 5 rows

P2, k1, k2tog, p2, k3, p2, k3, p2, k2tog, k1, p2

Continue in pattern for next 5 rows

P2, k2, p2, k1, k2tog, p2, k2tog, k1, p2, k2, p2

Continue in pattern for next 5 rows

P2, k2tog, p2, k2, p2, k2, p2, k2tog, p2

Continue in pattern for next 5 rows (k2, p1, k2….)

P2, k1, p2, k2tog, p2, k2tog, p2, k1, p2

Continue in pattern for next 5 rows

P2, k1, k2tog, k1, p2, k1, k2tog, k1, p2

(K2, p3, k2, p3, k2

P2, k3, p2, k3, p2) twice

K2, p3, k2, p3, k2

P2, k2tog, k1, p2, k1, k2tog, p2

(K2, p2, k2, p2, k2

P2, k2, p2, k2, p2) twice

K2, p2, k2, p2, k2

P2, k2tog, p2, k2tog, p2

(K2, p1, k2, p1, k2

P2, k1, p2, k1, p2) twice

K2, p1, k2, p1, k2

Now do the knot-hole (buttonhole)

1st side:

P1, p2tog, p1 then turn the needle to knit back and forth on these 4 sts only.

(K4

P4) three times

Leave the sts on the needle and break off a yard of yarn.

Rejoin the ball of yarn onto the 2nd side and;

P2tog, p2

(K4

P4) twice

K4

Then using the yarn from the first side, p across the sts on the second side to join all sts.

Next row:

Ssk, k2, k2tog

P all

Ssk, k2tog

P2

K2tog and bind off remaining st.

Sew in all loose ends, et voila!


The reverse side...

The colours of the yarn bring to mind some lovely giant daisies that are brightening up the garden at the moment, so I thought I'd stick them in too!


Crochet Pattern for Rudbeckia – Black-eyed Susan

All last year I enjoyed hundreds of beautiful Rudbeckia flowers for months in my garden. Through beaming sunshine, misty rain and the early frosts, they remained a bunch of cheerful faces. This year, feeling the lack of them, I’ve been forced to crochet myself a substitute, and thought I'd write down the resulting pattern. I used some DK yarn from my plentiful yarn supply shelves, along with some aran weight Kilcarra yarn from Donegal (dyed green with last years Rudbeckia flowers - they provide a rich mossy green colour) for the stem and sepals.


Materials:

Yellow, Brown, Green DK yarn (I used aran for the brown and green)

3.5mm crochet hook (or as appropriate to yarn weight)

2 x 3.75mm dpns


Abbreviations: (are for U.S crochet – U.K in brackets)

ch/s - chain/s

sl st – slip stitch (sc)

sc – single crochet (dc)

hdc – half double crochet (htr)

rep – repeat

BO – bind off

CO – cast on (knitting)

kpk – knit, then purl, then knit into each st

For this flower I used knit and crochet, but if you prefer to do only crochet then for the stem: ch10, sc into each ch, beginning at 2nd ch from hook. At the top make 3sc into the top end, join with a sl st, then make 3sc into each of these scs (9 sts) Work as for sepals below using these 9 sts.


Petals:

Using yellow and crochet hook

1: ch 10

2: sl st in 2nd ch from hook, sc in next 2 chs, hdc in next 4 chs, sc in next ch, sl st in last ch.

Rep these 2 rows 15 times, making 15 petals, joined at the inside.

BO leaving a 15” tail for sewing up.


Flower head:

With brown and hook make a slip ring. Ch1.

1: 6 sc in ring. Pull yarn end to close ring. Ss in top of 1st chain.

2: ch1, *1 sc in next 2 chs, 2 sc in next ch, rep from *, then sl st in top of 1st ch to join round.

3: ch 1, 1 sc in each sc, sl st to join round and BO.


Stem and sepals: (i-cord)

Using green and dpns CO 3 sts.

K 3, *push sts to other end of right needle and without turning switch to left hand, then k 3, rep from * Pull yarn tight on 1st st each round to pull into a tube.

Continue until cord is 1.5” long or so.

Next round: kpk into each st (9 sts)


Sepals:

Working on 1 st at a time with the crochet hook, lift 1 st off the dpn and begin crocheting with it:

*1: ch4

2: sl st in 2nd ch from hook, 2 sl sts in next 2 chs

Now lift next st off needle onto hook and rep from * until all sts are used. Join round with a sl st if needed.


Making up:

Block and pin out the petals and sepals.

Pin petals around the flower head and sew in place. (They may need a little bunching in.)

Stuff the top with a little spare wool.

Sew sepals to underside of petals, and weave all ends in. Hooray, it’s a Rudbeckia!


There's the real thing, just for comparison.
Please let me know if there's any mistakes!
x

Grupat

By popular demand...here's the Grupat show from the Project Arts Centre last week.
Above, the costumes of the Dowager Marchylove - her busby in the centre, and some pictures of her taken at the Hellfire Club and the Twelfth Lock in Clondalkin below. Thats right, she does have a beard.


Then her graphic scores in rosette form. On the opening night everyone was given a rosette to wear.


The Parks Service brought us a shed filled with drawings from their game - The Legend of the Fornar Resistance, in which the Augments take over planet Erade and blow Emeraldia to pieces. Viewers used a UV torch to reveal hidden messages on all the maps and drawings.

Turf Boon's xylophone made out of teddy bears of ascending sizes, with "black" keys above the "white" keys, and two sticks with teddy heads on the end to play it with.

Detleva Verens' beautiful stick scores - this one based on the paths satellites trace over Dublin.

Violetta Mahon's portable shrine - The Importance of the Filaments, made in a suitcase.

The Bulletin M's graffiti scores on the left here - musical graffiti on walls and written on stones, and on the right, Flor Hartigan's Telegraph - photographs of telegraph wires that the viewers were invited to stick musical notes onto.

There was high demand for drawing and sticking notes on.


The finished piece will be played as a musical score in Barcelona.


The Grupat Cabinet of Curiosities was filled with graphic scores and sculptures from all members of Grupat.

Here are the dream diaries of Violetta Mahon and handmade scores.

The nailed score of Detleva Verens - Aquifera.

And last but not least, musical scores by Bulletin M and the Dowager Marchylove are hidden in the Dublin mountains - under several feet of snow last week. The dice scores are in a geocache waiting for people to take them home. Check out the geocaching website using keyword Grupat. This is a view of their location last week!

There was also an installation by O'Brien Industries - a couple of thousand white balloons in a dark space with a swing in the middle. Visitors took a torch in and had a swing while listening to the sounds being played through four speakers, getting closer and further away as they swung towards each one, and the stirring of hundreds of balloons...
Of course we had to take some of the balloons on a walk home when they had finished their job.